

Overview
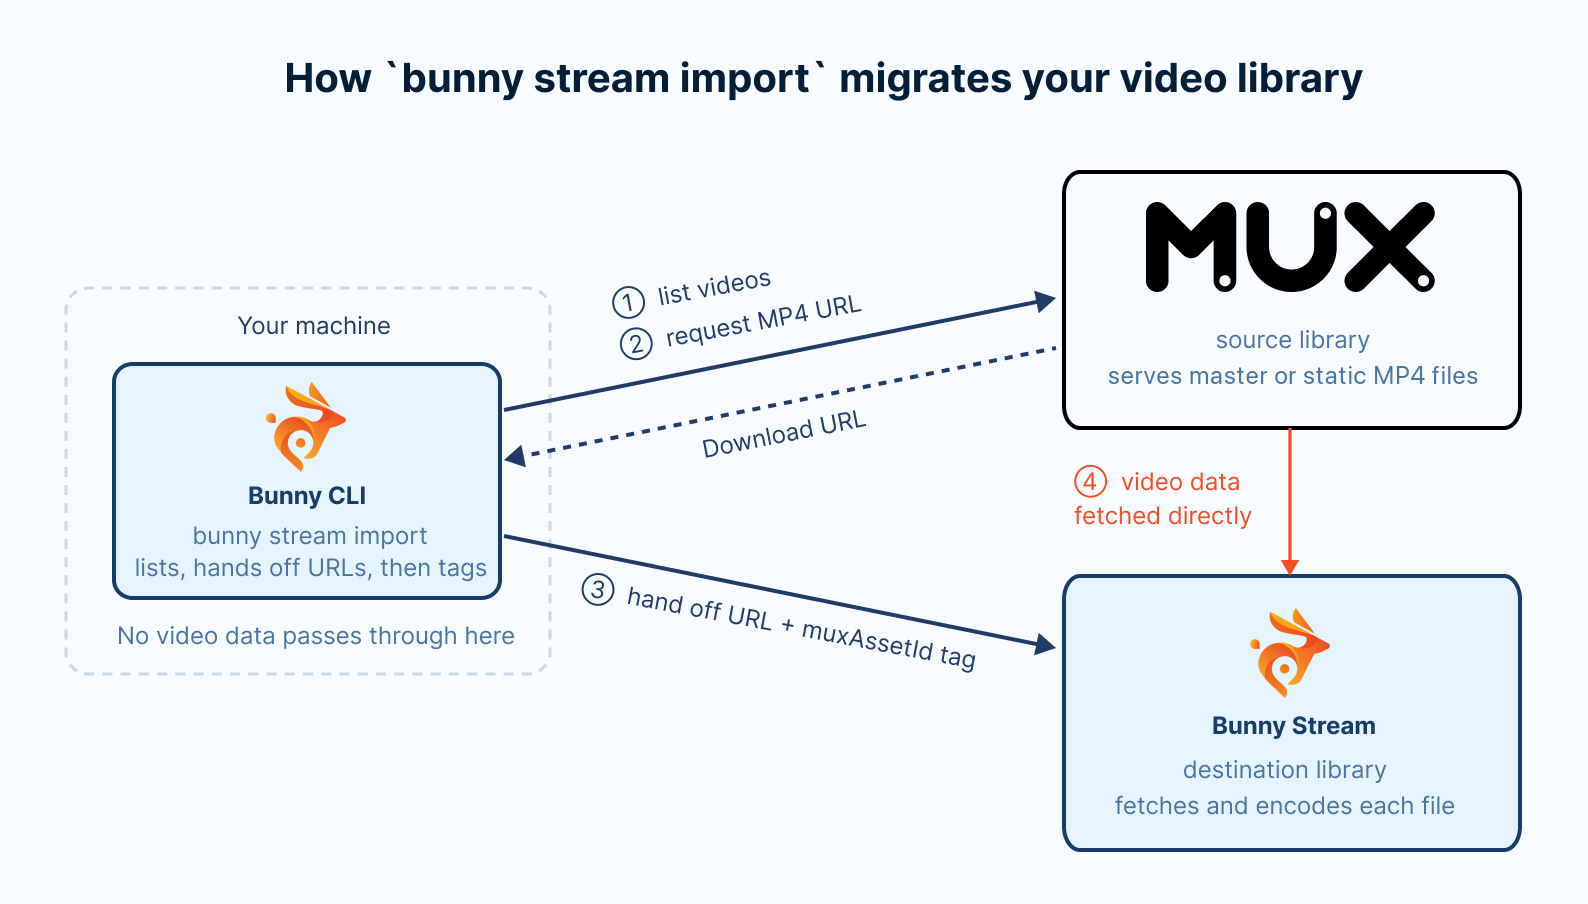
muxAssetId metatag, so running the import again skips videos that are already imported.
Scope
The import copies the video files and their titles. Settings that control how and where videos play stay on Mux, so plan to set up their Bunny equivalents.Prerequisites
- A bunny.net account
- A Mux account
- Python 3, to run the helper script in step 4
Migrate your videos
1
Install and authenticate the Bunny CLI
Install the Bunny CLI with the shell installer or npm:The installer downloads a prebuilt binary for your platform and places it on your See Installation for more options. Then authenticate the CLI with your bunny.net account:
- curl
- npm
PATH.bunny login opens your browser to complete authentication and stores the credentials locally. The first time you log in from an interactive terminal, it also offers to install the agent skill for AI coding tools. On a remote machine or in CI without a browser, run bunny login --api-key "$BUNNYNET_API_KEY" instead, with a key from Account Settings > API key.2
Create a Bunny Stream library
Create a library for the imported videos, or skip this step to use an existing one:DE is always the main storage region. Replicate to the regions closest to your audience, from When the CLI asks how to add videos, choose Later. You start the import in the next steps.Copy the library ID from the output. You pass it to
UK, SE, NY, LA, SG, SYD, BR, and JH. You can’t remove a replication region later.Set encoding options, such as
--resolutions or --encoding-tier, when you create the library. Changes you make later apply only to new uploads, not to videos that are already imported. Run bunny stream libraries create --help to see every option, or read Encoding.--library in the import commands. The flag also accepts the library’s name, and --lib works as a short alias.3
Create a Mux access token
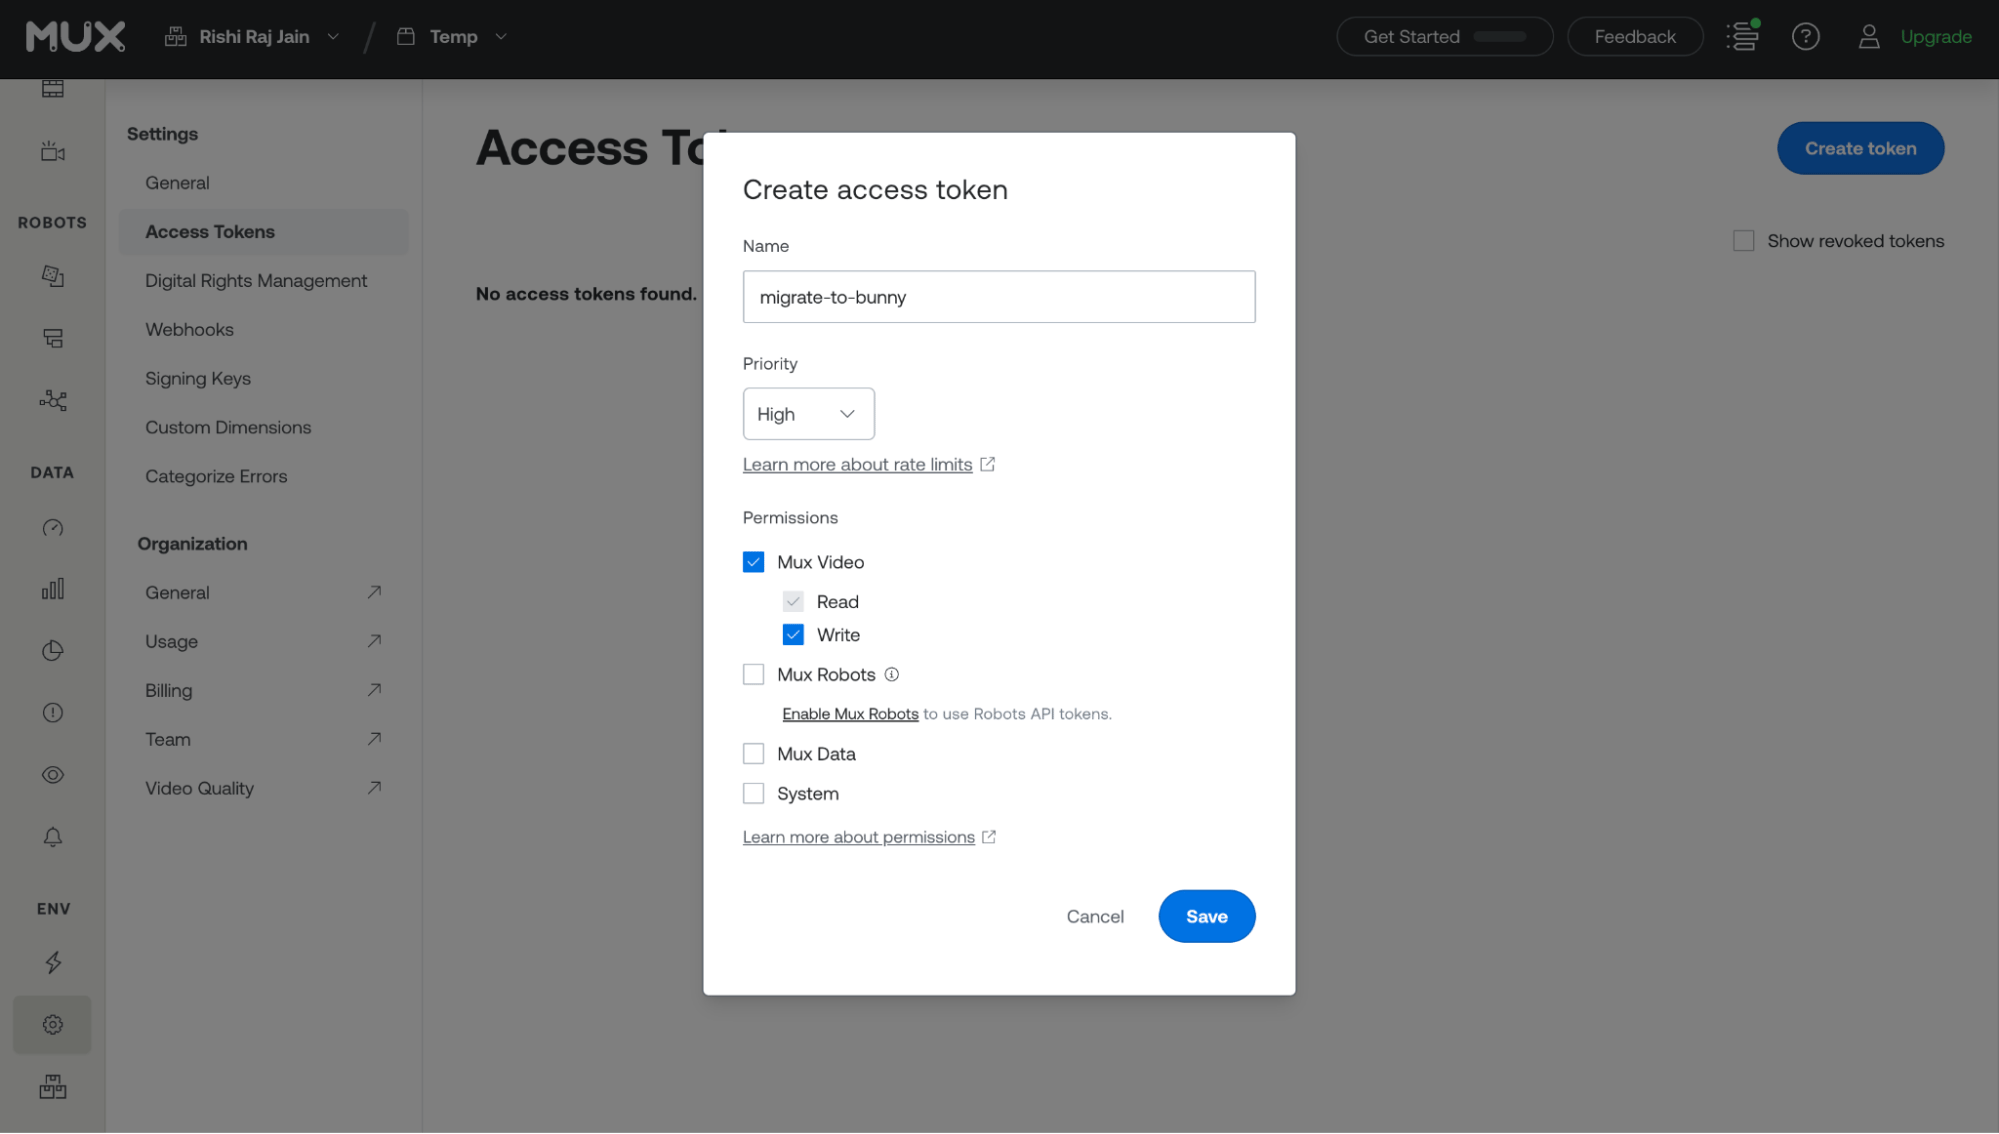
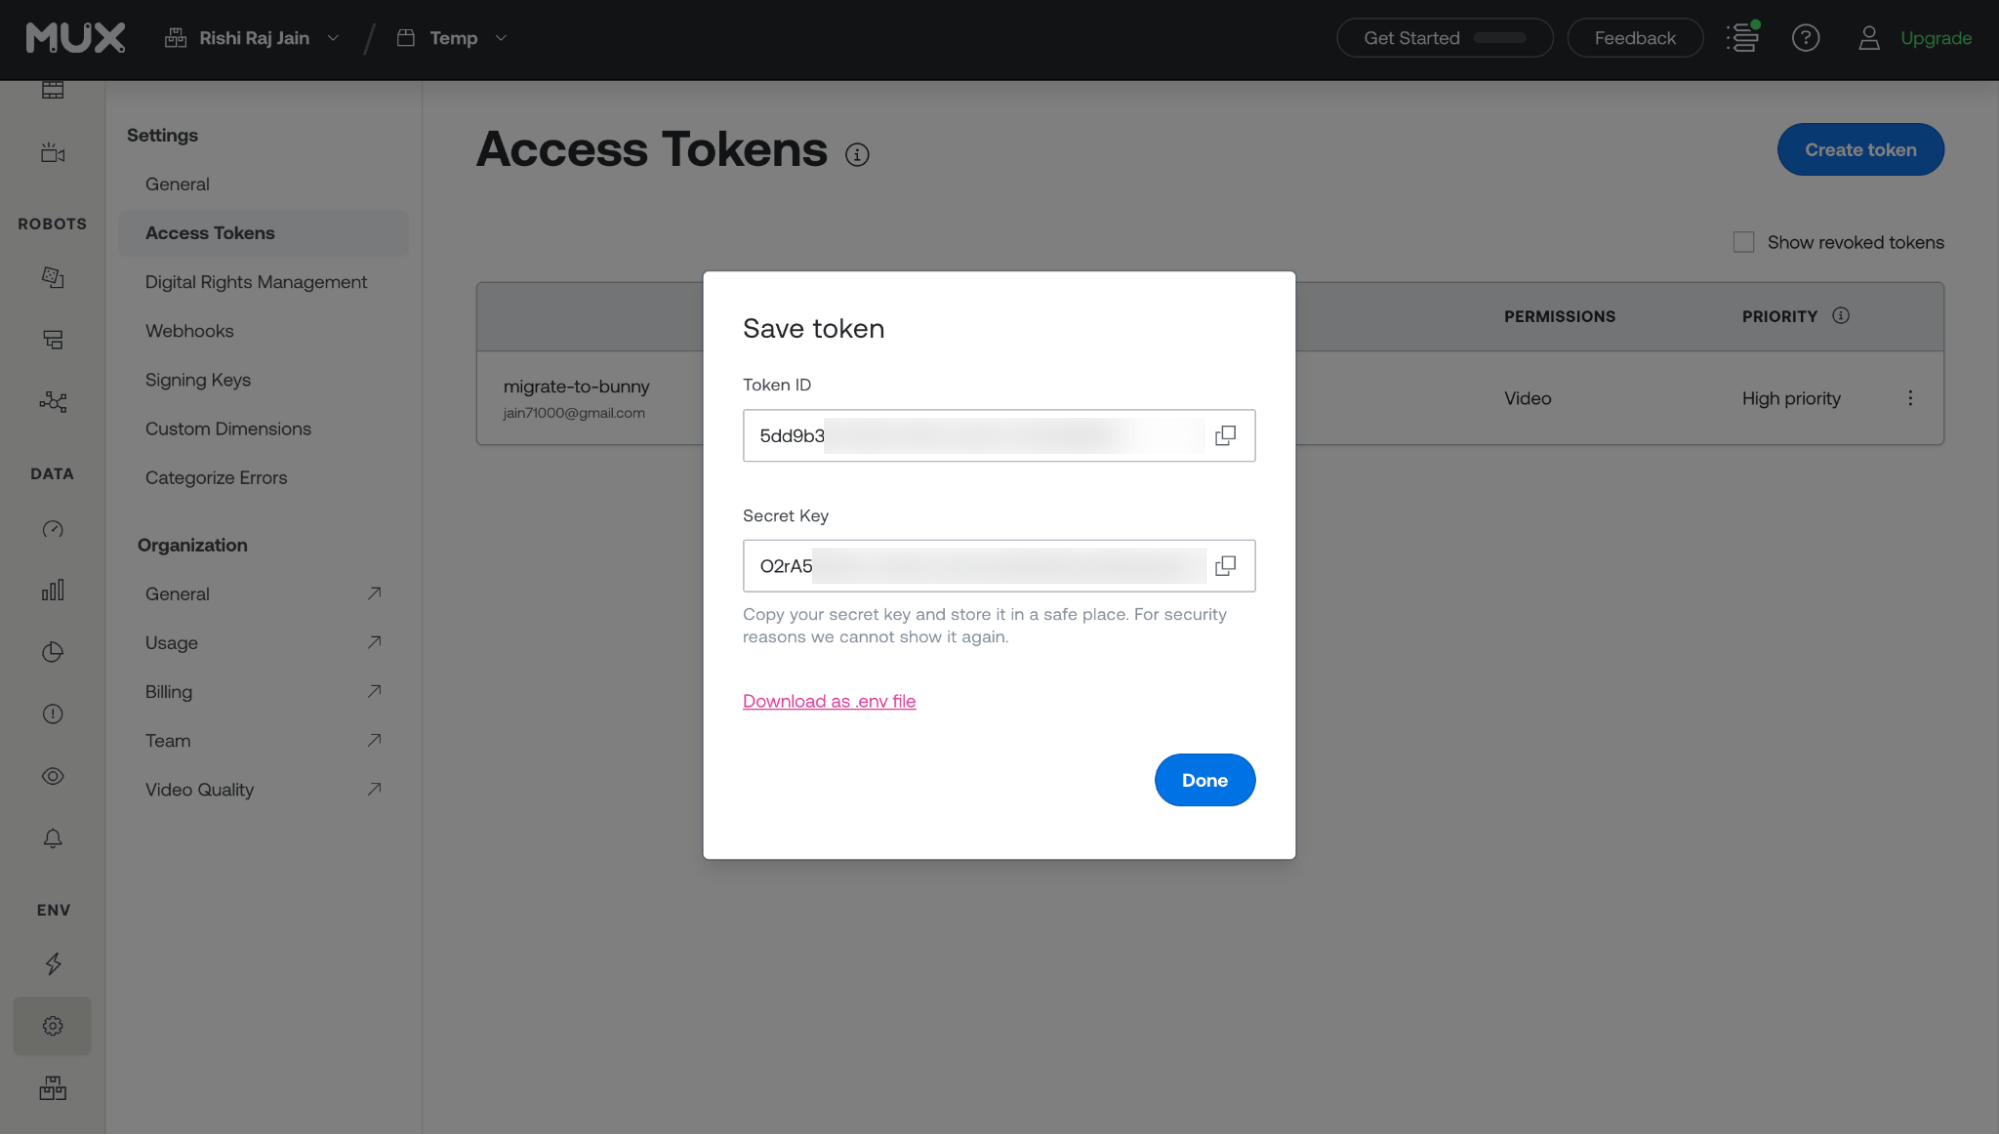
The Bunny CLI needs a Mux Token ID and Secret Key to list your videos and look up their download URLs.Open Settings > Access Tokens in the Mux dashboard and click Create Token.
4
Make your Mux videos downloadable
Bunny imports a video by fetching a file from a URL. Mux stores your videos for streaming, so a downloadable file exists only when one of the following is true:
Run it and enter your Token ID and Secret Key when prompted:The script reports its progress and finishes once every master file is ready:
- Master access is enabled: Mux prepares a temporary copy of the original upload. The CLI prefers this file because it is the highest quality version of the video, and it also works for videos with signed playback IDs. The master URL expires 24 hours after Mux makes it ready.
- Static MP4 renditions are ready on a public playback ID: the CLI picks the first one available in this order:
highest.mp4,capped-1080p.mp4, then the resolution renditions from2160p.mp4down. Renditions on signed playback IDs cannot be used, as Bunny cannot supply the signed token those URLs require.
enable_mux_masters.py:enable_mux_masters.py
enable_mux_masters.py
enable_mux_masters.py
5
Preview the migration with a dry run
Run the import with Once Mux accepts them, the CLI offers to save them so later runs skip these prompts. Press Enter to accept:
The dry run then prints a summary and the import plan:Already imported counts videos that are already in the library, and To import counts the ones a real run would import. Mux’s asset list does not report file sizes, so the summary has no Size row.Every video is listed under (no collection), since Mux has no folders. A video without a title on Mux is listed under its asset ID and keeps that ID as its title on Bunny. You can rename it in the dashboard after the import.The dry run does not check whether each asset has a downloadable file. An asset with no ready master file or public static MP4 rendition still appears in the plan, then fails during the import.
--dry-run, using the library ID from step 2:--dry-run prints the import plan without making any changes to either platform.The CLI then prompts for your Mux credentials. Enter the Token ID at the Token ID prompt and the Secret Key at the Token Secret prompt:Where the CLI stores credentials
Where the CLI stores credentials
The CLI stores saved credentials in
~/.config/bunnynet/stream-import-credentials.json (or under $XDG_CONFIG_HOME/bunnynet/ when it is set). Only your user account can read the file, and it is separate from the main Bunny CLI config. Saved credentials belong to the active Bunny CLI profile. If Mux later rejects them, for example after you revoke the token, the CLI deletes them and prompts again on the next run. If you answer no, the CLI prompts on every run.The MUX_TOKEN_ID and MUX_TOKEN_SECRET environment variables always take priority over saved credentials.6
Run the import
Run the same command without The CLI prints the same summary, then asks for confirmation. Type The CLI skips videos that are already imported, hands the rest to Bunny three at a time, and tags each one with The import command also accepts these flags:
--dry-run:y and press Enter to start:muxAssetId. It returns once every video is queued. Bunny then fetches each file directly from Mux and encodes it.--waitkeeps the command running, with a live encoding progress indicator, until Bunny has encoded every video.--forceskips the confirmation prompt and the offer to retry failed videos, for unattended or CI runs.--concurrency Nsets how many videos the CLI passes to Bunny in parallel, from 1 to 20.--clean-faileddeletes the failed Bunny copies of videos before importing them again, including videos that Bunny rejected.--retry-stalleddeletes and imports again any video stuck at zero bytes on Bunny.--request-timeoutsets how many seconds one request to Mux or Bunny can take before it gives up (default 30).--video-timeoutsets how many seconds the hand-off of one video to Bunny, or with--waitits encoding, can take before it gives up (default 5400).
bunny stream import --help for the full list.7
Watch encoding progress
The import returns before Bunny finishes encoding. Check progress with the status command:It prints one row per queued video, with its status on Bunny, encode percentage, size, and when it was queued:Run it again until the last line reports 0 processing. The command exits with a non-zero code when any video has failed, so you can also use it as a check in scripts.
8
Verify in the bunny.net dashboard
Open the bunny.net dashboard and go to Stream > Your library > Manage library to confirm every video has encoded.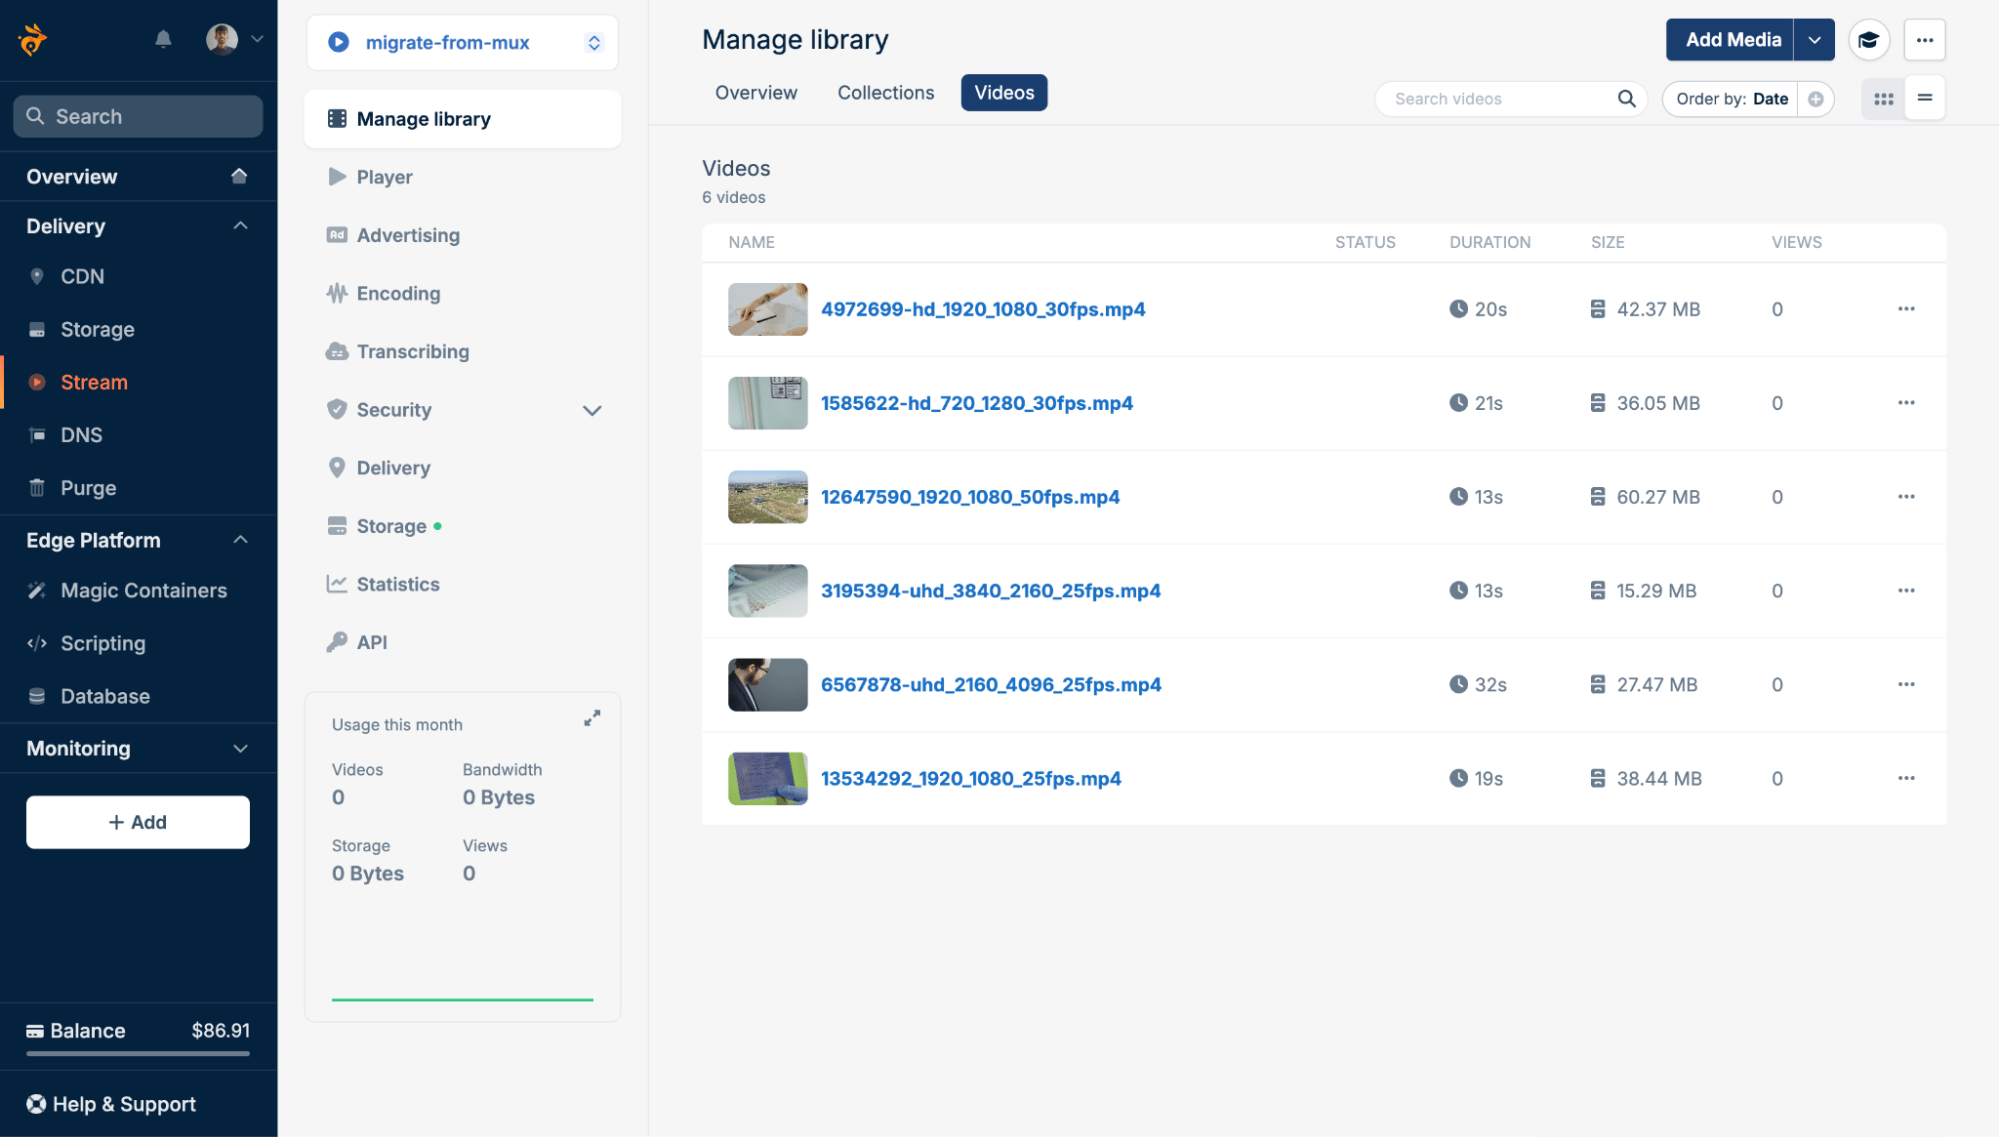
Troubleshooting
Some videos failed during the import
Some videos failed during the import
When videos fail during an interactive import, the CLI lists each failure and offers to retry them:Answer
y to retry them in the same run. If the import was interrupted, or you declined the retry, run it again with --resume:--resume retries failed videos, processes any that were still outstanding, and re-applies the muxAssetId tag to videos Bunny fetched before the run stopped. It stops retrying a video after three failed attempts and skips videos that Bunny rejected. To retry those too, add --clean-failed, which deletes their Bunny copies first.Running the import again is always safe. Videos that already carry the muxAssetId tag are skipped, and the CLI reports Everything is already imported once nothing is left.No download available
No download available
The video had neither a ready master file nor a usable static MP4 rendition when the CLI looked it up. This happens when you skipped step 4, when a master file was still preparing, or when more than 24 hours have passed since the master files became ready.Decline the retry prompt, run the script from step 4 again, then run the import again without
--resume. Requesting master access again gives each expired master file a fresh URL, and a plain run retries every video that is not yet in the library. Repeat until the import reports that everything is already imported.For very large libraries, static MP4 renditions on public playback IDs avoid the 24-hour window, since they do not expire. Check Mux’s pricing for static renditions before you enable them.The helper script stops with a 401 or 403
The helper script stops with a 401 or 403
Videos are stuck with no data
Videos are stuck with no data
If
bunny stream import status reports videos stuck at zero bytes, run the import again with --retry-stalled to delete and fetch them again.Migrate more than one Mux environment
Mux access tokens are scoped to a single environment, such as Production or Development. To migrate several environments, repeat steps 2 to 8 for each one, with a token created in that environment. Import each environment into its own Bunny library. The CLI keeps one saved import per source and library, so a separate library keeps each environment’s progress,--resume, and status apart, and keeps test videos out of your production library.
The CLI saves one set of Mux credentials per Bunny CLI profile, and uses it without prompting for the next environment. Point the CLI at the next environment’s token in one of these ways:
- Set
MUX_TOKEN_IDandMUX_TOKEN_SECRETin your shell. Environment variables always take priority over saved credentials. - Run the import with a different Bunny CLI profile, using
--profile.